Sunday, March 17, 2013

Castle Cake for Abby and Cate

This is Abby (5) and Cate's (3) birthday cake. Their birthdays are both in the first week of March so we did their party together.  They told me they wanted a Princess Cake and I was going to do the Princess Doll cakes but I decided since I hadn't done a castle cake before I would try it.  I had a blast doing it and lots of fun doing the detail work.  I wanted to do a moat and bridge but I simply ran out of time. 


This is a chocolate cake from Ron Ben Israel's recipe  Chocolate Layer Cake. It can put you into a chocolate coma, which isn't a bad thing for some.  I used the same butter cream recipe and fondant recipes that I have used in other cakes, but I am about to bust out and find different recipes.

I used a plywood board for the cake board.  Very helpful for heavy cakes.  I covered it with foil.
 
Cate carefully checked out each thing on the Castle.  I put the plastic Princesses on the cake so they could have a toy when they were done eating the cake.  Abby checked out the cake too.  The girls dressed up as princesses and their guests wore whatever costume they wanted.
 
The front door garnishments were made from a Wilton silicone mold and then painted with bronze luster dust and vodka.  The vodka evaporates and leaves the dust adhered to the fondant. 
 
The walkway was Wilton Pink Sugar Sprinkles.  I made the flowers out of gum paste and used some Wilton flower sprinkles to fill in the extra spaces.

 I bought the crowns and princess hearts from Walmart.  They are Wilton decorations.  I made the baby roses out of fondant.  I used royal icing for the leaves on the tree and around the roses. I also used royal icing to glue on details.
 
My favorite thing to make was the "bird bath".  It was also the hardest.  But I think it turned out super cute.  I also like the stairs leading up to one of the side doors on the turret and the little vase of roses at the edge of the balcony at the top of the stairs.


The girls were so excited for the birthday party.  Their grandparents from Main flew out just for the occasion as did their Aunt and Uncle from Montana.  You can tell they just love to be Princesses.

Friday, March 1, 2013

Davy's Fourth Birthday Cake - Buzz Lightyear and Friends

 This cake was fun to do.  At first I didn't know what to do but I figured out how to make the aliens after doing some research on line.  The Buzz Lightyear is a toy that Davy gets to play with when all the partying is over.

The fondant turned out much better on this cake.  I still used the Marshmallow Recipe, but I am planning on checking into buying fondant on line. 

I used the Funfetti cake mix.  Davy likes sprinkles, a lot!  So I always do this because it is his favorite.

For doing a theme cake I think it turned out pretty good.  There is always room for improvement and I can see things in this cake I would do differently but all in all I really like it.


Friday, February 15, 2013

Elegant Birthday Dress Cake

 
This is my daughter's 31st birthday cake.  I have been excited about doing a "dress" cake for some time and scoured the Internet to find ideas.  I finally put this together.  I drew it out first and then dove in.  It was more difficult than I thought.  

 I worked for several weeks on the gum paste roses.  I wanted them to look more real than the ones I did in the past.  I used petal dust with vodka and brushed on the colors to give them a vintage look.  I am happier with these and realized the more I practiced the better I got. Duh!!

I made 80 roses and buds and used almost all of them on the cake.  I wanted to be sure I had enough in case some broke.

This cake took four recipes or box mixes.  I used box because they work the best at high altitude.  I found a site on line that showed how to keep cakes moist without adding simple syrup and without cutting the "domes" off to even out the cake.  It worked!  So here is the link. Keeping cakes moist without using simple syrup.
I looked at dress for different designs for the bodice.  I came across one that had this swag look and loved it.  I also wanted to be sure to have the dress back look like a dress back with stitching and buttons.  I used a Wilton roller tool for the stitching. I used pearl for the buttons and necklace.  I made the 31 out of gum paste and integrated it into the necklace.

I have to say that I am terribly unhappy with how my fondant turned out this time.  I usually use the marshmallow recipe and make my own fondant. It was full of tiny air bubbles that I just couldn't get out no matter how hard I tried.  I don't know if that is because of the "Jet Puffed" marshmallows or not.  Gut says it is. 

I am toying with the idea of ordering some fondant on line.  I want to see if it handles better.  Will let you know what kind I find and how I like it.

Sunday, December 30, 2012

Don's Delicious Apple Pie Turnovers


Melt two tablespoons butter in a large skillet and add two of your favorite apples, peeled, sliced (1/4 " thick), and cored with 1 cup craisins or dried cherries. (You can go half and half also).

Let cook until tender.  Add 1 cup loosely packed brown sugar, 1/8 tsp cloves, and 1/4 tsp nutmeg.
Stir until apples are well coated.  You can add a bit more butter if needed.
 Cut the apple circles into wedges.  You can do this before hand but they are softer after cooking but you can do it either way.  When you leave the apples round they seem to cook more evenly.

Roll out one sheet of Pastry Puff Dough on a lightly floured surface and cut into four squares.

Place a spoonful of apple mixture in the center of each square.  Beat one egg well and brush egg wash on two edges of the "V" in the square.  Fold the dough over and gently press evenly around the edges. Place the turnovers on a baking sheet covered with either baking paper or pastry baking sheet.  If you used these you don't need to grease the sheet. 

With a fork dipped in flour to keep it from sticking mash down the edges lightly to seal off the dough.   Take a knife and poke a small "vent" hole in the top of each turnover.  With the remaining egg wash brush liberally all the turnovers.  This helps them to become golden brown.  Then sprinkle a small amount of raw or decorating sugar crystals on top of each turnover.
Bake at 400 degrees for 18 to 20 minutes or until golden brown.  Let cool a bit before serving as the filling is really hot if you try to eat it too soon.

Enjoy!!!

Monday, December 17, 2012

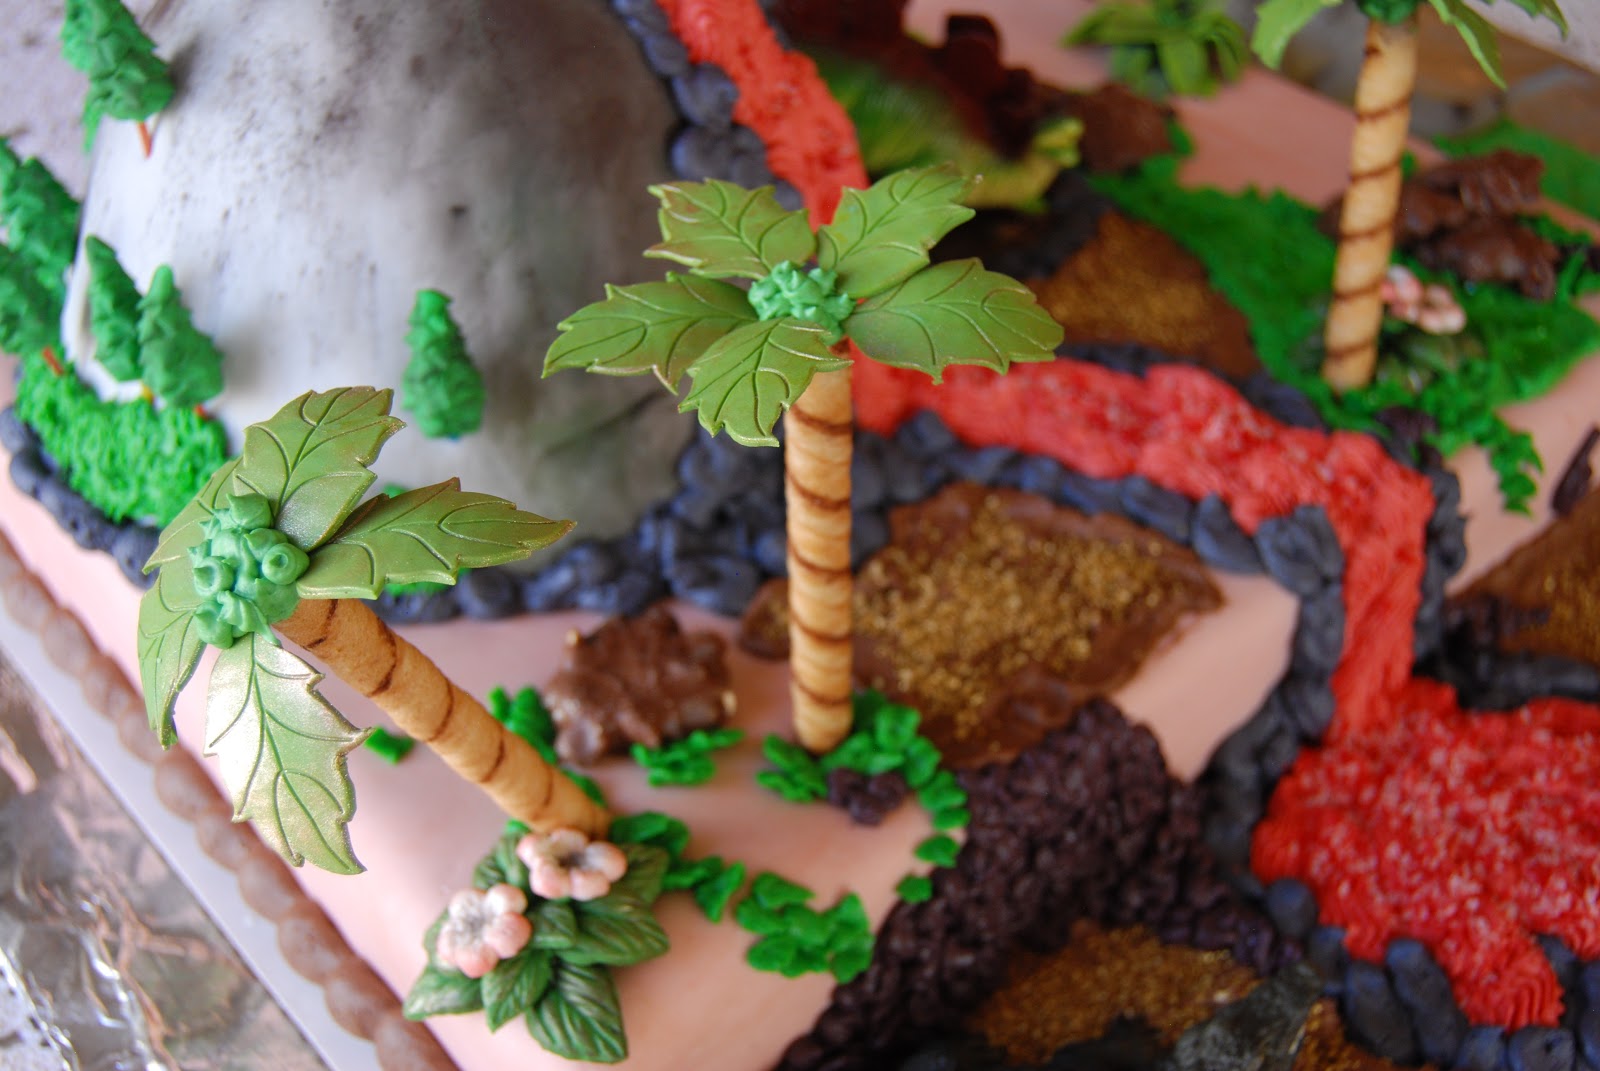
Dinosaur Volcano Cake

This was my Grandson, Sebby's, sixth birthday cake.  I promised him a working volcano.  What I did was put a small can I saved from using green chili's into the middle of a cone cake made from rice crispy treats.  I used a doll dress cake pan for the mold. To make the volcano "erupt" I pour water over a small piece of dry ice that I dropped in the can.  It worked well - smoked all over the cone. Then I put his candles around the top of the crater for him to blow out.
 I used four chocolate cake mixes for the base of the cake.  I covered it with fondant and used butter cream frosting to decorate all the lava, rocks, and grass. I used gum paste to make the leaves of the palm trees.  The trunks are cookie straws. I made a pool of "tar" from melted dark chocolate for the tar pit.
For the plants I molded them from gum paste and veined with a leaf vainer.  Then I glued each leaf together with royal icing to make the plants.  I used a leaf tip to make the "ivy" growing down the side of the cake and up trees.  For the "rocks" I used nut cluster candies.
 To make the dirt look sandy I used gold sprinkles on top of brown butter cream frosting. I also used red and white sprinkles along the red lava.

I was going to sculpt the dinosaurs but then found pretty good plastic ones at Walmart for $1 each so I bought enough for each of the kids to take one home as a party favor.
 This cake was a huge success with the kids.  They really liked the "erupting".  I wanted to use sparklers but didn't have any and couldn't find any in the stores at this time of year. Will have to remember to stock up next July.

Sunday, November 4, 2012

Bird House Cake

This is by far the most fun cake I have made.  My sister-in-law LOVES birds and for her birthday I knew that I wanted to make a birdhouse cake for her.  I went on google and typed in bird cake images and found a slew of ideas for this project.  Believe me there are many wonderful cake decorators out there with awesome ideas. 
 
How I chose what to do is simple.  I wanted a clean and detailed cake design that I, a novice, could do.  I know that I am not proficient at clean straight lines so I picked a round design.  I used 8 " round cake pans and made four layers.  I used my small Pyrex bowl for the round top and trimmed the bottom to fit the height I wanted. I also used stabelizers to support the roof and weight.
 
I made my yellow Black Eyed Susans out of gum paste and used the daisy cutter.  I used petal dust as a finisher.  For the centers I used a mold to create it, covered it with smokey petal dust and bronze sparkle dust.  For the leaves I used a vainer to get the right look on the leaves and then brushed bronze petal dust on the edges.  I wanted the house to have a glittered look but not too overwhelming.  I also used a mold to make the little blue bird on the branch to the left of the door.  The mold I found in Walmart.  It's a Wilton mold with tree branches, flowers, leaves, and bird all on one. 
 
I made a white cake with a chocolate ganache filling.  White cakes are hard because they are crumbly.  I need to find one that isn't too dense but not so crumbly either.
The red flowers on the cake I made while at my Mom's this past summer.  I was practicing different types of flowers and I liked this trumpet shaped flower so I stored them until I found the right project.  They were the perfect fit for color in this arrangement. 
 
For the base fondant color of the birdhouse itself I chose an eggshell blue.  My sister's favorite bird color.  She also loves the warm oranges and browns of fall so this worked out perfect for her.


I brushed the smokey petal dust on the bird house first to give it an outdoor worn look.  Then I used the bronze dust over that.  It look perfect.  For the roof I cut shapes out with the heart shaped cutter and brushed them with the same dusts.  Before I brushed the house and the roof tiles I used a roller "cutter" to gently score lines to simulate wood grain.  I was a bit worried at first because the dust didn't go on evenly.  But I realized that it looked more rustic by allowing the dust to "cling" to areas on the fondant.  Look at the back.  It seems to have a swath across it.  It just looked rustic and so I left it.
 
The two ceramic birds are salt and pepper shakers that I gave to her as her birthday present. As you can see my sister-in-law was VERY please with her cake.
 

HAPPY BIRTHDAY DENICE!

Saturday, October 20, 2012

Practice, Practice, Practice - The Art of Cookie Making

I thought I would share with you the results of my practicing the Art of Cookie Decorating.  You can go to my blog on "Cookies, Cookies, Cookies" for the links to recipes. 
 
I learned that you cannot rush this.  A bit slower and deft hand will get the best results. But not too slow.  Also, the consistency of the frosting is key.  You'll just have to practice until you get it the way you want it.
 
 
I made these two dresses for my granddaughters.  They loved them.  The one at the top didn't flood well so I decorated over my mistakes.  It turned out pretty cute.  Though I am still striving for perfection around my boarders I am getting better and the cookies look more professional.  These are made for a birthday party tomorrow.  I am also making cupcakes and I will share those when they are done.  They promise to be super fabulous!