Saturday, April 5, 2014

Callie's Baby Shower Cake


I made this baby shower cake for my daughter who is having a baby girl in May.  I was going to make a two tiered cake but changed my mind when I decided that this would be a three layer cake with chocolate ganache filling.  I also made cupcakes for the kids and the Raspberry Lemon Tart.  The shower went smoothly and Callie got some really sweet things for my new granddaughter.
 
I found a pattern on Google for the baby shoes and made them out of gum paste.  I did them a couple days before putting the cake together so they would dry well. They turned out really cute.
 
For the Teddy Bear I used half gum paste and half Marshmallow Fondant. I didn't have a pattern but just did it from memory.  I have looked at so many Teddy Bears on line that it wasn't that hard.  I started with the body and then the legs and worked my way up.  I did use a tooth pick inserted in the body and up enough to attach the head do that it would be a bit more stable.  Purists wouldn't do that because you can't eat the bear with wood sticks in it. However it is dried so hard that people won't eat it anyway.  I also let people know what is edible and what isn't before cutting the cake.
 
I used Hershey's Perfectly Chocolate Cake for High Altitude. To get the cake to be moist and a little dense I take it out of the oven and instead of waiting 10 minutes to remove it from the pan I remove it immediately onto the right size cake board and cover it with really good (restaurant quality) plastic wrap. Not to tight as it will shrink from the heat and pull your edges in.  I wrap it loosely two or three times and then put it in the freezer. Oh, before removing it from the pan take a tea towel and lightly press down on the cake until the dome is flat and even with the outer edges.  This will help it stay more dense and not too fluffy for fondant cakes.  Fluffy cakes don't hold up that well with heavy fondant. This also saves you from having to trim off the top to make it flat and even. Then remove as directed above. 
Yellow Cake with Raspberry filling and butter cream frosting
tiny confetti dots and Teddy Bears.
 
 
Callie with sister, Casey, and friends Patricia Perry and Darlene Maes.


Simple decorations was just how Callie wanted it.  The pink lanterns
are hanging over the baby crib now.  So cute!
 

Wednesday, March 19, 2014

Pirate Ship Birthday


I have three grand kids whose birthdays are all in the first week of March.  Abby and Cate asked for a pirate cake and Davy was happy to comply.  So here it is. 

This wasn't an easy cake. I had a cabin carved out but when I put it in the fridge to cool while I worked on the fondant  it cracked completely in half.  So I had to improvise!  It still turned out cool, but there is so much I would do better next time.  I let Davy pick the flavor which was confetti.  Not my favorite, but the kids loved it.  I used the usual icing and fondant. 
 
I used Tootsie rolls for the railing wood and roped fondant for the hand rail.  I tried to use just a flat piece of fondant for the railing but it wanted to droop between the "boards. The rope worked much better.  I also think I did much better on the palm tree this time. I used brown sugar for the sand and root beer candy barrels.  I made the treasure chest out of gum paste and filled it with decorating pearls and gold sprinkles. Rolos are the cannons on the sides of the ship.
 
For the masts and sales I used wooden skewers and gum paste to make the sails.  I laid the sails over a bottle to get them to curve until dry.  I painted the Jolly Roger with food coloring.
 
For the boards I used a pizza roller to indent the slats and then brushed with petal dust to get the woody affect on both the deck and sides of the ship.
 
I was going to make a pirate, but Davy wanted Captain Hook.  So I found a set of figurines that the kiddos could play with. 


Tuesday, February 11, 2014

Homemade Pizza with Chef Cate


 Making Pizza is a  very kid friendly thing to do and my little Chef Cate just loves cooking with me.  So we made pizza....she made cheese and I made a veggie with white sauce. 


Dissolve 1 tablespoon of yeast in 1 cup warm water.
 Should be between 110 and 115 degrees.
Let it set for about 10 minutes until frothy.
Next, in a separate bowl mix 2 cups bread flour,
1 teaspoon salt, 2 teaspoons white sugar.


Stir with wire whisk until dry ingredients are well blended.
Next add 2 Tablespoons of olive oil to liquid yeast mix.
With a dough hook mix on low while pouring in yeast mixture. 
Turn up speed and scrape edges of bowl.
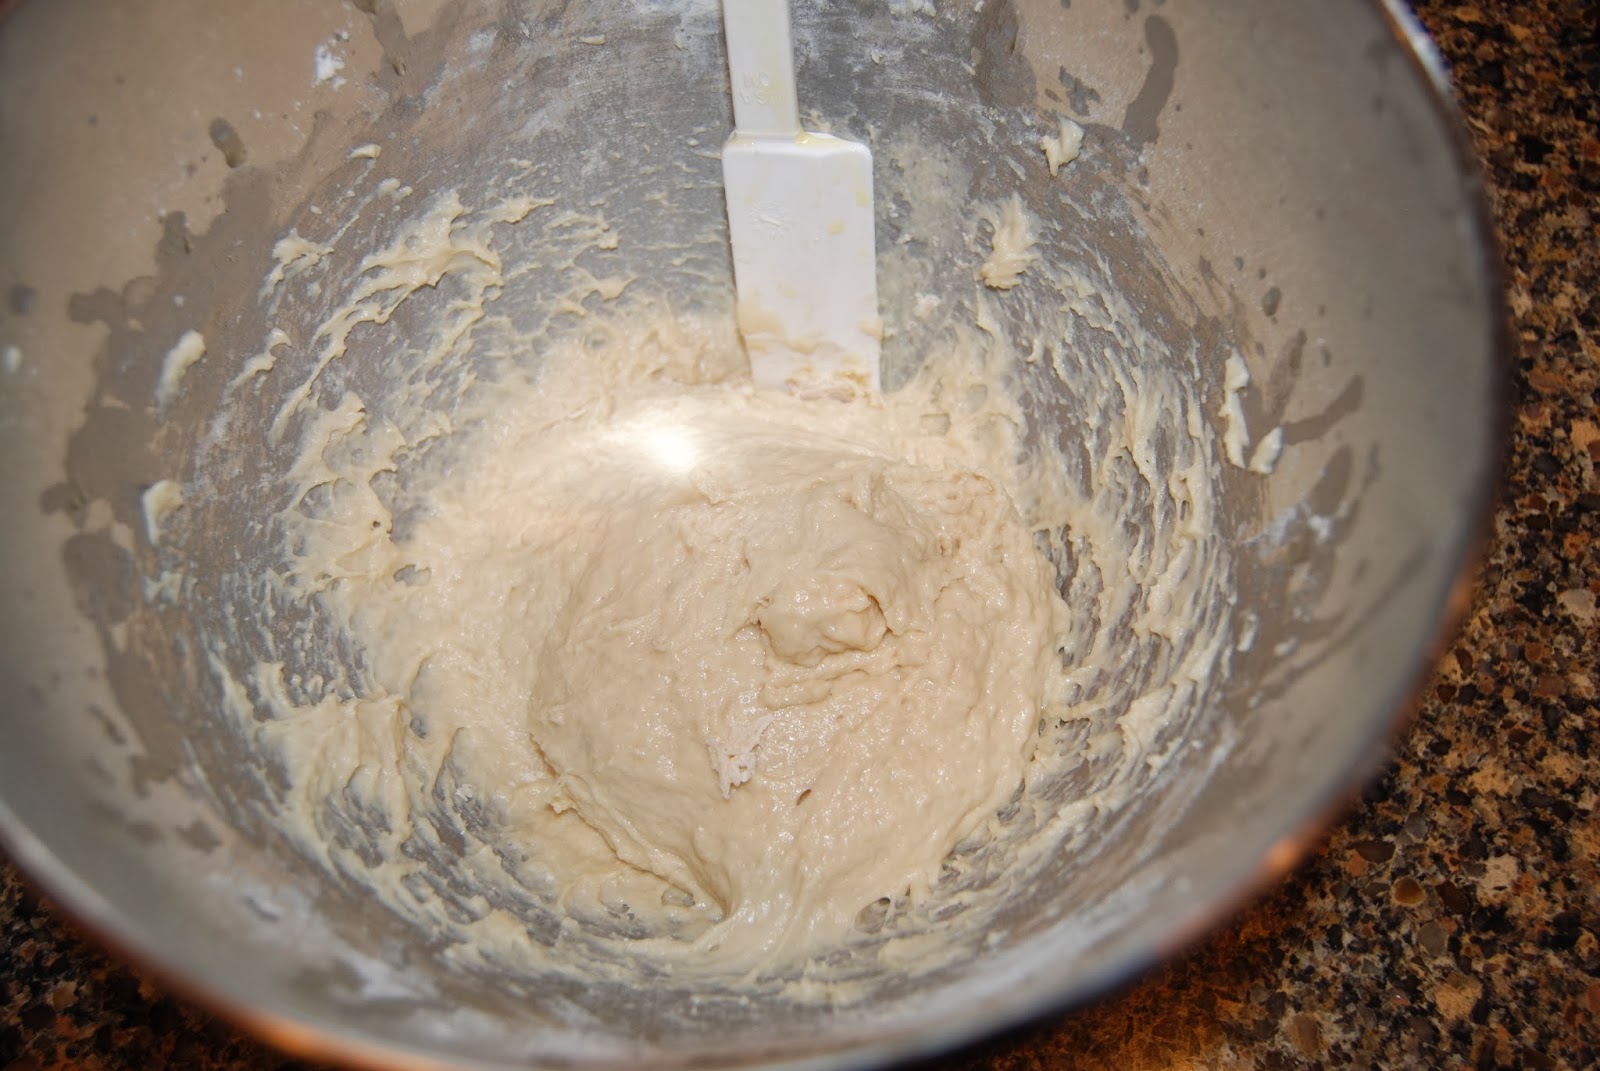
Mix until flour is well mixed with liquid. 

Dough will be sticky.

Next put some flour on the clean counter top.

Spread flour with hands.

Pour dough on counter and with floured hands kneed dough for
about a minute.

Shape dough into ball.

Place dough in a bowl and cover with plastic. 
Let it rest for 30 minutes.

Clean work area!

On a sheet tray brush Olive Oil until thinly
covered. About 1 Tablespoon or so.

Next preheat oven to 350 degrees.
Lightly sprinkle with corn meal.  This helps the pizza to not
stick to the tray and adds some crunch to the crust.

Next divide the dough in half and roll out into two pizzas.
This makes a thinner crust which we like. I used a pizza stone
for mine. I did that same as Cate did for preparing the pan.
We rolled out our Pizzas and placed them on the pans and
finished shaping them into a round circle.
Bake in the oven for 10 minutes.

Remove pizza from oven.
Spread your favorite sauce over the pizza.  Cate used some high
quality left over Marinara sauce for hers.  Don't use cheap Pizza
sauce....this is gourmet after all!

Next spread the pizza with your favorite cheeses.
We used fresh grated parmesan, sharp cheddar,
and shredded mozzarella. 

Bake for 10 to 15 minutes or until the edges brown nicely.

Enjoy....blow first.  It's hot!
 The other grandkids liked it too.  This pizza was gone in seconds!


Tuesday, January 21, 2014

Lemon Raspberry Tart - Yum!


This is a not-to-sweet lemon tart. It’s perfect for a fine dining experience and is now one of my hubby’s top ten favorites. The crust is from Paula Deen’s Peach tart recipe because it doesn’t have eggs. The filling is from Anna Olson on the Food Network Website. The filling does have eggs, but I just wanted to cut down on cholesterol a bit. Still.....
 
servings:Makes 8 - 10
cook time: 45 minutes 

Ingredients

Crust
  • 1 1/4 cups all-purpose flour
  • 1/2 cup (stick) butter, room temperature
  • 2 tablespoons sour cream
Filling
  • 1/3 cup lemon juice
  • 1/4 cup sugar
  • 4 eggs
  • 1 cup whipping cream
  • 1 tablespoon lemon zest
  • 1 to 2 pints of washed and dried Raspberries whole for topping the tart.
Raspberry Sauce
  • 2 pints fresh raspberries washed
  • 2 Tablespoons water
  • 1/3 cup honey or more to taste

directions

To make the crust:
  • Place the flour, butter, and sour cream in a food processor and pulse to combine. When the dough forms a ball remove from processor and place in an ungreased (remember all that butter?) tart pan with a removable bottom that has been placed on a cookie sheet (This protects the bottom from coming up while transporting to the oven).
  • With lightly floured hands press evenly around the tart pan and up the sides. This takes a bit of time to get even but it is worth it so don’t speed through it.
  • Place in a 350 degree oven for 15 to 18 minutes until it just starts to get lightly browned.
  • Remove from oven and pour filling in warm tart.
To make the filling:
  • Reduce oven temperature to 325 degrees after baking crust.
  • Whisk together lemon juice, sugar, eggs, cream and zest and pour into tart shell.
  • Carefully move tart to oven and bake for 25-30 minutes, until tart stops jiggling when you tap it. Tart filling should not soufflé at all. Allow tart to cool at room temperature for a bit, then chill for 2 hours before finishing.
Raspberry Sauce
  • Place berries in a sauce pan with water and honey. Bring to a boil over medium heat stirring occasionally until the berries are broken down and the juices are bubbly. (don’t walk away from this. Before you know it they could burn.) Let reduce a bit till syrup is slightly thick.
  • Pour hot syrup through a strainer to get out the seeds. Let cool completely.
  • Note: be sure to taste the syrup to make sure it is sweet enough to your liking.
Assembling the Tart
  • Carefully lift the bottom up of the tart pan out of the rim and place the tart with the bottom on a flat serving dish. I use a pedestal serving plate.
  • Pour a thin layer of syrup over the top of the tart. You may not want to use all the syrup. The tart won’t cut well if you have too much. It depends on your tastes.
  • Start on the outer edge of the tart and form a line of raspberries around the perimeter. Then do a second row and so on until you reach the center. Dust with powdered sugar just before displaying.

notes:

This tart can be made a day ahead and then anytime up to six hours before serving finish with the fresh raspberries. I would dust with the powdered sugar just before serving. This dessert should be cut in small wedges. It is light but rich.

Friday, January 17, 2014

My First Real Wedding Cake

 
Today I have the honor of delivering my first wedding cake. It is a Western theme with Teal and Black as the colors.  I have made wedding cakes before but not one for hire.  I can now understand why they are so expensive, much more than birthday or other occasions.
 
First, you want it to be perfect.  It's the cake that will be seen for years to come.  Though Birthday cakes are in pictures it's more about the person and new pictures and cakes will be taken next year.  But a wedding cake is supposed to be a once in a life time event (not sure if that really goes much anymore, but one would hope!). So the pressure to get it right so it photographs well and to taste good is enormous.  If it doesn't look good than the pictures are messed up.  If it doesn't taste good than you don't get referrals!


I made gum paste flowers with stamens in the middle.  These turned out rather well and were pretty sturdy.  I used a black ribbon around the cake.  Normally I would have used fondant ribbon, but the client wanted real ribbon and it does have cleaner lines.  Was easy to put on too.

They provided the wedding cake topper, a rope with boots and hats and a heart studded with crystals.  Pretty.


The hardest parts of this cake was getting the texture right and rolling fondant.  It was a dense French vanilla with raspberry filling.  I'm still not sure about the texture but the flavor was really good and it will cut well.  I am still searching for the right recipe and there are so many.  Altitude has everything to do with cake baking and it is tough to get one that doesn't dry out or crumble to pieces when you cut it.

As you know I make my own fondant.  It think it tastes better than commercial.  I also don't have the sheeter to roll it so I have to do it by hand.  The top cake I rolled five times before getting it reasonably decent.  The bottom I rolled once....practice makes better.  My arms and wrists were aching so bad I had a hard time sleeping last night and believe me, standing on your feet for two hours straight without a break and rolling fondant and another three hours putting the cake together is no picnic.  I need equipment!!!

All in all though I think this turned out as professional as any cake out there.  I was very pleased and I think the Bride and Groom will be too.  Now off to make the delivery!

Saturday, December 7, 2013

Indiana Jones Cake

 
This Indiana Jones cake was a pretty big cake and took quite a bit of time to get done.  Since I don't have a fondant sheeter for spitting out nice rolled pieces of fondant and I rolled all this by hand. My wrists and forearms are killing me. I told my husband that if I'm going to keep doing these kinds of cakes I would have to break down and purchase the right equipment to make it much easier.  His comment, "Here comes the conditions!"  Ha, ha funny guy! I know that he enjoys watching the creations and he even helps with cutting sticks and making structure supports.


It's Sebby's 7th birthday and I asked him what he wanted me to make.  He has this Pitfall game on the computer  that is much like Indian Jones so we did this style of cake.  "Grammy, I want a HUGE cake!"  And this is pretty huge.  
 
Okay, I know some of you are saying, "Wait a minute! How can a river flow down both sides of the rock?"  Well let's pretend there is a spring up there or it's the Great Divide or something.  I needed to do something with water on both sides  and limited space. My husband told me that you can do whatever you want with cake!  In any case, with the spiders, snake, crock and scorpion it turned out pretty cool.
The cake is chocolate, of course.  Raspberry filling is in the top two cakes. I used my usual butter cream frosting and fondant that I make from scratch. Click on this site for  recipes.
http://whatscookingamerica.net/PegW/Fondant.htm

Callie, my oldest daughter is turning 34 and decided she wanted in on the Indiana Jones theme. I mean - Harrison Ford?! Come on! (Sebby's and Callies's birthdays are three days apart.) So the smaller cake is an Lemon Cream Cake with lemon cream filling (her request).  The heroine is on the top of the cake ready to pound a spider to death with a frying pan or machete whichever gets the job done. 

I used the coated marshmallows for the "ruins" and root beer barrel candies for the ammo stash.  The tree trunks are long pretzel sticks.

This is the first cake that I didn't have a clear plan of what I wanted to do until I started putting the cake together.  I had the cakes baked and in the freezer.  I just didn't know how it would turn out.  I did go to the Internet to get ideas and then I just put it together.  It turned out pretty well for not know what I wanted to do though I wouldn't recommend doing cakes like that very often. I'm glad it didn't turn into a mess.

Tuesday, November 26, 2013

Grammy's Cran-Apple Pie


I post lots of decorated cakes but this time I am posting a Cran-Apple Pie.  I don't usually make pies because I didn't have a great crust recipe.  Then I found, and watched, Alton Brown's pie recipe.  You can go to http://www.foodnetwork.com/recipes/alton-brown/pie-crust-recipe/index.html to view the demo.  I do have to tell you that I don't use his exact recipe because I don't use lard in my baking.  I will put mine below.  The key is to use very cold butter and liquid.  Alton does have tricks to rolling out the dough too.  I found his suggestions very helpful to get me started.

Dough Recipe
(Make two recipes, one for top (lattice work) and one for bottom)
1 1/2 cup all purpose flour
1/2 teaspoon salt
1 stick butter unsalted cubed (should be very cold!)
1 Tablespoon vinegar
2 Tablespoons milk or half and half
1 Egg beaten (for brushing the top to help brown nicely)


Instructions
Place flour and salt in food processor. Pulse to distribute salt evenly.
Next add very cold cubed butter.  May be placed in freezer for 15 minutes prior to using.
Pulse until blended enough to look like small pellets in dough.  Don't over blend.  You want tiny balls of butter in dough and not have it blended so much it starts to glutonize or become sticky. Then you 
have tough dough.....yuck!
Next add vinegar and pulse two or three times quickly.
Next add very cold milk or half n half a small amount at a time until the dough forms pellets that when pressed together will hold its shape. Depending on where you live you may need less liquid or more. (See video for visual)
Place dough in plastic bag and form into disc and place in fridge while preparing the filling, about 30 minutes.
Thinly sliced apples cook better.
 
Cran-Apple Pie Filling
1 cup fresh cranberries
1 cup apple juice
6 Granny Smith Apples peeled and cored and sliced into thin slices
1 to 1-1/2 cups granulated sugar
 (If you have ice-cream with this and you like less sweet just use one cup other wise add another 1/2 c sugar for more sweet.)
2 Teaspoons cinnamon (My hubby loves extra so I put in a little more)
1/4 teaspoon salt
1 small lemon juiced
1/2 cup flour
2 Tablespoons corn starch
1/2 stick butter cubed into small cubes


Instructions for Filling
Rinse cranberries and place them in a sauce pan with apple juice.  Cook until softened. Set aside.
Place prepared apples in a large bowl and cover with lemon juice. Stir well to cover the apples so they don't turn brown. Combine sugar, cinnamon, salt, flour, and corn starch.  Stir well and pour over apples. Stir until apples are covered with flour mixture. Add cranberries and juice and stir till well blended. Set aside.
On a well floured surface (I use a pastry cloth and sock for my roller well covered with flour) place the chilled dough for the bottom and roll out to about 1/8 " or so.  Place in bottom of pie pan and leave some over hang of crust. If you have some good size trim scraps save them. I will explain later.  (Don't re roll them. Just lay them flat off to the side.)
 Fill the shell with apple mixture. Place the small cubed butter all over the top of the apple filling evenly. Set aside.


Take the second batch of chilled dough for the top and roll out the same as you did for the bottom.  Do your lattice top (see: http://www.youtube.com/watch?v=Hv4809RKhzg on how to do it) or just lay the dough over the top, trim, crimp, (the above video shows how to tuck and crimp edges) and poke some vent holes in the top.  Brush the top with the beaten egg.  This helps it brown beautifully.
Bake at 350 degrees for 40 minutes.  Then cover the top with foil and bake another 40 minutes.
With the extra dough I used a leaf cutter and made some leaves to put on the top for an extra touch.

I always like to have pie warm and I think this is definitely better warm with vanilla ice cream melting on top. I have updated this recipe a couple of times already. Let me know if you try it and what you think by leaving a comment.  Always looking for good critics! Enjoy!